Iterm2 With Oh My Zsh

Few years ago I wrote a post about ConEmu, a better shell experience for Windows. I have been using it over the past four years while working on Windows. Recently I completely moved to Mac and on unix system we have better shell experience in general. Today we will see how we can setup iTerm2, with zsh and Oh My Zsh providing a way superior shell experience than ConEmu on Windows or even than the regular terminal.
Install iTerm2
If we don’t have brew yet installed, we start by installing it:
1
/usr/bin/ruby -e "$(curl -fsSL https://raw.githubusercontent.com/Homebrew/install/master/install)"
We then install iTerm2 using brew:
1
brew cask install iterm2
Once we have iTerm2 installed, we can switch the default shell to zsh:
1
Preferences > Profiles > General > Command - Select Command and enter "/bin/zsh"
We will now be using zsh by default.
Now that we have iTerm2 and are using zsh by default, we can install Oh My Zsh, which is a framework managing zsh configuration.
1
sh -c "$(curl -fsSL https://raw.githubusercontent.com/robbyrussell/oh-my-zsh/master/tools/install.sh)"
After the installation, we should already see the difference in term of theme as the default oh-my-zsh theme gets installed.
iTerm2 Features
Autocompletion
iTerm2 also comes with autocompletion, with zsh, we can also have autocomplete on the plugins specified. For example, if we have in ~/.zshrc:
1
plugins=(git)
We can start typing git check then tab, and we will have the following prompt:
1
2
3
4
5
6
7
╰─ git check
check-attr       -- display gitattributes information
check-ignore     -- debug gitignore/exclude files
check-mailmap    -- show canonical names and email addresses of contacts
check-ref-format -- ensure that a reference name is well formed
checkout         -- checkout branch or paths to working tree
checkout-index   -- copy files from index to working directory
Split Panes
iTerm2 allows us to split the terminal in panel with cmd + D for vertical split and cmd + shift + D for horizontal but when split, the inactive panels are dimmed which is annoying if we are using other windows to display a man page for example therefore we can remove the dimming by changing the appearance:
1
Preferences > Appearance > Dimming > Untick "Dim inactive split panes"
Natural Text Editing
Another settings good to have is the make option and command keys behave just like in a text editor, allowing navigation per words or complete beginning or end of line. This can be done by setting the keys presets to natural text editing.
1
Preferences > Profile > Keys > Presets > Select natural text editing
Install powerlevel10k
Now that we have iterm setup with zsh and we have discovered some of the nice feature provided, we can install powerlevel10k which is a zsh plugin providing a powerline (a bar with different information). It is highly customizable and can show the path, git status, time, etc…
We start by downloading powerlevel10k into zsh themes:
1
git clone https://github.com/romkatv/powerlevel10k.git $ZSH_CUSTOM/themes/powerlevel10k
Then we can modify ~/.zshrc and modify the ZSH_THEME:
1
ZSH_THEME="powerlevel10k/powerlevel10k"
Update: If you start from a fresh install, stop here and check the update following Roman comment.
Next we specify the mode which will give us fonts:
1
POWERLEVEL9K_MODE="awesome-patched"
And we can download the fonts from here. Open the font and install it on Mac then select it from:
1
Preferences > Profile > Text > Font (select SourceCodePro+Powerline...)
Some extra settings can be added to make the prompt multiline:
1
2
3
POWERLEVEL9K_PROMPT_ADD_NEWLINE=true
POWERLEVEL9K_PROMPT_ON_NEWLINE=true
POWERLEVEL9K_RPROMPT_ON_NEWLINE=true
And lastly set the directory length to two segments:
1
POWERLEVEL9K_SHORTEN_DIR_LENGTH=2
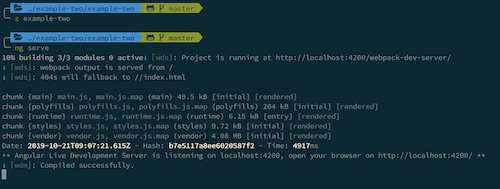
And now your prompt should look as such:
The content of the ~/.zshrc should resemble to:
1
2
3
4
5
6
7
8
9
10
11
12
13
14
15
16
17
18
19
20
21
export PATH=$HOME/bin:/usr/local/bin:$PATH
export ZSH="/Users/kim/.oh-my-zsh"

ZSH_THEME="powerlevel10k/powerlevel10k"
ZSH_COLORIZE_STYLE="emacs"

plugins=(
  git
  ng
  virtualenv
)

source $ZSH/oh-my-zsh.sh

POWERLEVEL9K_LEFT_PROMPT_ELEMENTS=(dir vcs)
POWERLEVEL9K_RIGHT_PROMPT_ELEMENTS=(virtualenv)
POWERLEVEL9K_PROMPT_ADD_NEWLINE=true
POWERLEVEL9K_PROMPT_ON_NEWLINE=true
POWERLEVEL9K_RPROMPT_ON_NEWLINE=true
POWERLEVEL9K_MODE="awesome-patched"
POWERLEVEL9K_PYTHON_ICON=$'\U1F40D'
And that concludes today’s post!
Conclusion
Today we saw how we could use iTerm2 and zsh with Oh My Zsh. We started by looking at how we could install it, setup its configuration, then we moved to installing Powerlevel10k, the powerline for zsh. This shell configuration helped me becoming more comfortable working with the terminal on Mac as it makes it very friendly and improved my workflow by making it quicker for me to program. I hope you like this post and I see you on the next one!
External Sources
Update
@romkatv commented on the post advising me to remove the Powerlevel9k configuration in order to display the wizard configuration for Powerlevel10k.
1
2
Normally, when you install powerlevel10k, it'll automatically launch a configuration wizard.
However, when you manually define POWERLEVEL9K parameters, the wizard is suppressed
So if you are coming from a fresh install, don’t add any powerlevel9k configuration and Powerlevel10k will display a configuration wizard to configure the preferred display.


