Xamarin Android Line Chart With Custom Renderer Canvas Api Part1


Last week I needed a line chart to plot expenses. I had two choices: use an existing library or draw the chart myself on canvas. I decided to go for the second - draw the chart using the Android Canvas API. I chose this approach because it gives me full flexibility to create a style and behaviour that match perfectly my application.
Here’s the chart result:

This tutorial will be composed by four points divided in two parts:
- Xamarin.Forms custom renderer (Part 1)
- Explore the Android Canvas API (Part 1)
- Create a GraphView which will draw a line chart (Part 2)
- Use it (Part 2)
1. Xamarin.Forms custom renderer
Officiel documentation: https://developer.xamarin.com/guides/xamarin-forms/custom-renderer/
A custom renderer is a class used by Xamarin.Forms to define platform specific behaviours of your views. In this tutorial, we will be using a custom renderer to access the Android native Canvas API to draw a line chart using data given by a view defined in a cross-platform project Xamarin.Forms.
1.1 BoxRender
Let’s see how we can make a custom renderer to access the Canvas API of a BoxView.
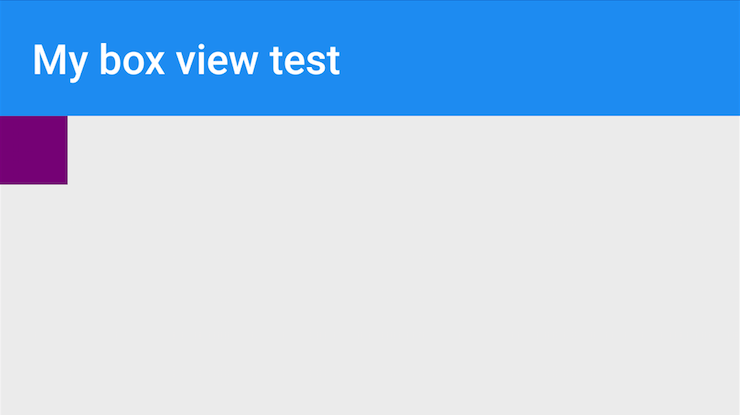
First, create a class which inherit from a BoxView, here MyBoxView, in the shared project.
1
2
3
4
5
6
7
namespace BoxRendererTest
{
	public class MyBoxView: BoxView
	{
		public MyBoxView() { }
	}
}
Then in the Android project, create a renderer by inheriting from BoxRenderer and specifying the ExportRenderer assembly attribute.
1
[assembly: ExportRenderer(typeof(MyBoxView), typeof(MyBoxViewRenderer))]
BoxRenderer gives us access to native functions of the view.
Here we override OnDraw which is called to draw the view to the canvas and draw a red rectangle.
1
2
3
4
5
6
7
8
9
10
11
12
13
14
[assembly: ExportRenderer(typeof(MyBoxView), typeof(MyBoxViewRenderer))]
namespace MyBoxViewTest.Droid
{
	public class MyBoxViewRenderer: BoxRenderer
	{
		Paint paint = new Paint { Color = Android.Graphics.Color.Red };

		protected override void OnDraw(Canvas canvas)
		{
			canvas.DrawRect(new Rect(0, 0, 100, 100), paint);
			base.OnDraw(canvas);
		}
	}
}
1.2 Databinding with Custom renderer
The power of Xamarin.Forms resides in its databinding system. In order to use databindings with custom renderer, you will need to create your own property.
For our MyBoxView, we will create a BoxColor property binding.
If you aren’t familiar with creating bindings, you can refer to my previous post:
https://kimsereyblog.blogspot.co.uk/2016/10/build-accordion-view-in-xamarinforms.html
1 - Create a BindableProperty.
Here we create a bindable property called BoxColor which we will use to color the small rectangle drawn in the previous section.
1
2
3
4
5
6
7
8
9
10
11
12
13
14
15
public class MyBoxView : BoxView
{
    public static readonly BindableProperty BoxColorProperty =
        BindableProperty.Create(
            propertyName: "BoxColor",
            returnType: typeof(Color),
            declaringType: typeof(MyBoxView),
            defaultValue: Color.Transparent);

    public Color BoxColor
    {
        get { return (Color)GetValue(BoxColorProperty); }
        set { SetValue(BoxColorProperty, value); }
    }
}
And here’s how we can use the property value from within the custom renderer:
1
2
3
4
5
6
7
8
9
10
11
12
13
14
15
16
17
18
19
20
21
22
23
24
25
[assembly: ExportRenderer(typeof(MyBoxView), typeof(MyBoxViewRenderer))]
namespace MyBoxViewTest.Droid
{
	public class MyBoxViewRenderer: BoxRenderer
	{
		Paint paint = new Paint();

		protected override void OnElementPropertyChanged(object sender, PropertyChangedEventArgs e)
		{
			base.OnElementPropertyChanged(sender, e);

			if (e.PropertyName == MyBoxView.BoxColorProperty.PropertyName)
			{
				this.Invalidate();
			}
		}

		protected override void OnDraw(Canvas canvas)
		{
			paint.Color = ((MyBoxView)this.Element).BoxColor.ToAndroid();
			canvas.DrawRect(new Rect(0, 0, 100, 100), paint);
			base.OnDraw(canvas);
		}
	}
}
OnElementPropertyChanged will be called when a property changes,
then we can check if the property changed is the BoxColor by doing e.PropertyName == MyBoxView.BoxColorProperty.PropertyName.
If it is, we call Invalidate() which tells Android to redraw the view and OnDraw will be call again.
When OnDraw is called, we get the property from the view by using the this.Element property which contains the Xamarin.Forms element MyBoxView and get the color out of it.
I need to call ToAndroid because the color is a Xamarin.Forms.Color and needs to be transformed to an Android.Graphics.Color.
Note:
Not all renderers call OnDraw. Some renderers do not trigger OnDraw because they do not need to draw anything.
If for any reasons you need to provoke an OnDraw on those, you can set the SetWillNotDraw(true) method.
1.3 Hardware acceleration
Another important point is that if you don’t need older version of Android, make sure to set the minimum Android version to higher than API 14 to take advantage of the hardware acceleration.
Without hardware acceleration, a typical symptom is the view’s OnDraw gets called even when other views are changing and not the view itself.
This is very costly as we are going to draw a line chart. For example if you have a list view below your chart and a cell needs to be redrawn, without hardware acceleration, the graph will be redrawn too.
With hardware acceleration only views which are invalidated get redrawn.
Now that we know how to create custom renderers and know how to access the Canvas API, let’s see in more details what we can do.
2. Explore the Android Canvas API
When we need to draw anything, we need to get our hand on the canvas.
Overriding OnDraw provides us with the canvas of the view for our drawing.
Here is the official documentation of the Canvas API: https://developer.android.com/reference/android/graphics/Canvas.html
In order to draw things, the canvas provides functions which allows drawing of specific shapes.
1
2
3
4
5
canvas.DrawRect(...)
canvas.DrawCircle(...)
canvas.DrawArc(...)
canvas.DrawLine(...)
etc...
As you must have guessed, DrawRect draws a rectangle, DrawCircle draws a circle, etc…
All this functions take coordinates (points, center, radius) but also take a Paint.
A Paint is an object that holds all the configuration to draw the shapes like Color, TextSize or TextAlignement.
For example if we want to draw a green rectangle 100x100 at (0,0) we would do the following:
1
2
3
4
var density = Resources.DisplayMetrics.Density;
var paint = new Paint();
paint.Color = Color.Green;
canvas.DrawRect(new RectF(0, 0, 100 * density, 100 * density), paint);
Another important aspect is that every measure is defined in term of pixel.
In order to convert it to specify our measure in dp, we need to multiply it by the density.
I went into more details about dp in last week post, be sure to check it out .
Lastly another point is Clipping.
Clipping allows us to specify which part of the view needs to be redrawn.
1
2
3
4
5
canvas.Save();
canvas.ClipRect(new RectF(0, 0, 100 * density, 150 * density));
paint.Color = Color.Red;
canvas.DrawRect(new RectF(0, 0, 150 * density, 150 * density), paint);
canvas.Restore();
First we Save the canvas before clipping the execute a clipping on 100x150.
Then draw a rectangle 150x150.
Because we previously clipped 100x150, we told Android to only care about 100x150 and that what we should get.
And when we are done with our operations we can Restore the canvas to where it were when we saved it.
Clipping allows the system to improve performance by reducing the area to draw.
Here is a bigger example which demonstrate some of the functionalities of the Canvas API:
1
2
3
4
5
6
7
8
9
10
11
12
13
14
15
16
17
18
19
20
21
22
23
24
25
26
27
28
29
30
31
32
33
34
35
36
37
38
Paint paint = new Paint();

protected override void OnDraw(Canvas canvas)
{
    base.OnDraw(canvas);
    var density = Resources.DisplayMetrics.Density;

    // Draws a Green rectangle 100x100 at 0,0
    paint.Color = Color.Green;
    canvas.DrawRect(new RectF(0, 0, 100 * density, 100 * density), paint);

    // Saves canvas before executing clipping
    // Clips canvas to only draw in 50x100 at 50,50
    canvas.Save();
    canvas.ClipRect(new RectF(50 * density, 50 * density, 100 * density, 150 * density));

    // Draws a Red rectangle 100x100 at 50,50
    // Only 50x100 is drawn because the canvas is previously clipped at 50x100
    paint.Color = Color.Red;
    canvas.DrawRect(new RectF(50 * density, 50 * density, 150 * density, 150 * density), paint);

    // Restore canvas to before executing clipping
    // Translate canvas to 150x100
    // Draws a Blue rectangle 200x200 a 0,0 (translated)
    canvas.Restore();
    canvas.Translate(150 * density, 100 * density);
    paint.Color = Color.Blue;
    canvas.DrawRect(new RectF(0, 0, 200 * density, 200 * density), paint);


    // Draws touch coordinates
    canvas.Restore();
    canvas.Translate(-150 * density, -100 * density);
    paint.TextAlign = Paint.Align.Center;
    paint.TextSize = 14f * density;
    paint.Color = Color.Black;
    canvas.DrawText(x.ToString("F2") + "," + y.ToString("F2"), Width / 2f, Height - 5f * density, paint);
}
Now that you understand how to use the Canvas API, you are set to draw you own line chart and we will see that next week in Part2, stay tuned!
Full source code https://github.com/Kimserey/GraphTest.Droid2/.
Conclusion
Today we saw how we could define custom renderer for our Xamarin.Forms project. We saw how the custom renderer can be used to access the canvas of an Android view and draw shapes in it. This is the first part to understand how we can have the necessary blocks to draw our line chart which we will see in the next week! Hope you enjoyed this post as much as I enjoyed writing it. As usual don’t forget to follow me on Twitter @Kimserey_Lam and stay tuned for next week Part 2! See you next time!
Other post you will like!
- What does DP, DPI, PPI and PX represent in Android - https://kimsereyblog.blogspot.co.uk/2016/10/what-does-dp-dpi-ppi-and-px-represent.html
- Make a splash screen in Xamarin.Android - https://kimsereyblog.blogspot.co.uk/2016/10/how-to-make-splash-screen-with.html
- Make an accordion view in Xamarin.Forms - https://kimsereyblog.blogspot.co.uk/2016/10/build-accordion-view-in-xamarinforms.html
- Absolute layout in Xamarin.Forms - https://kimsereyblog.blogspot.co.uk/2016/09/absolute-layout-and-relative-layout.html


