Deploy Websharper Selfhost

Last week I talked about how to read text from an image using a OCR library.
I explained the whole process of creating the web app but I omitted to explain the deployment to Azure.
So today I would like to fill this gap by showing you how I deployed the selfhosted web app on Azure.
This web app makes use of the WebSharper selfhost template which is composed by a WebSharper sitelet mounted on a OWIN selfhost.
What are the steps to deploy a web app on Azure?
In order to make the web app available on internet, there are four steps to follow:
- Create default template
WebSharper client server selfhost - Bind to all interfaces
- Add urlacl (optional)
- Deploy to Azure
1. Create default template Websharper client server selfhost
Go on github and find WebSharper’s releases and get the latest vsix (Visual studio extensions).
https://github.com/intellifactory/websharper/releases

Install it and you will have access to all Websharper templates from Visual studio.
Create a default Selfhost client server application and run it.
If everything works well you should have a running web app.
2. Bind to all interfaces
If you created your projet from template, you should have an entry point which looks like this:
1
2
3
4
5
6
7
8
9
10
11
12
13
14
15
16
17
18
19
20
21
22
23
24
25
module SelfHostedServer =

    open global.Owin
    open Microsoft.Owin.Hosting
    open Microsoft.Owin.StaticFiles
    open Microsoft.Owin.FileSystems
    open WebSharper.Owin

    [<EntryPoint>]
    let Main args =
        let rootDirectory, url =
            match args with
            | [| rootDirectory; url |] -> rootDirectory, url
            | [| url |] -> "..", url
            | [| |] -> "..", "http://localhost:9000/"
            | _ -> eprintfn "Usage: test ROOT_DIRECTORY URL"; exit 1
        use server = WebApp.Start(url, fun appB ->
            appB.UseStaticFiles(
                    StaticFileOptions(
                        FileSystem = PhysicalFileSystem(rootDirectory)))
                .UseSitelet(rootDirectory, Site.Main)
            |> ignore)
        stdout.WriteLine("Serving {0}", url)
        stdin.ReadLine() |> ignore
        0
This code will start a OWIN selfhost hosted on http://localhost:9000/. If you don’t provide any arguments while launching the .exe,
it will only bind to your localhost.
In order to make it available to all, you must bind it to all interfaces.
To do so, replace localhost by +.
1
let rootDirectory, url = "..", "http://+:9600/"
Now if you try to run the web app, it will crash unless you ran it as an administrator. Either you can choose to always run as administrator or you can reserve this url for your user account. This can be done by adding a urlacl.
3. Add urlacl (optional)
To add a urlacl, open a command prompt and execute the following commands:
1
2
netsh http
add urlacl url="http://+:9600" user="username"
To find what is your username you can use whoami from the command prompt.
You can view your urlacl already added by typing show urlacl.
After that you added the urlacl, when launching the .exe, it should not crash anymore.
You are now ready to deploy the web app.
4. Deploy to Azure
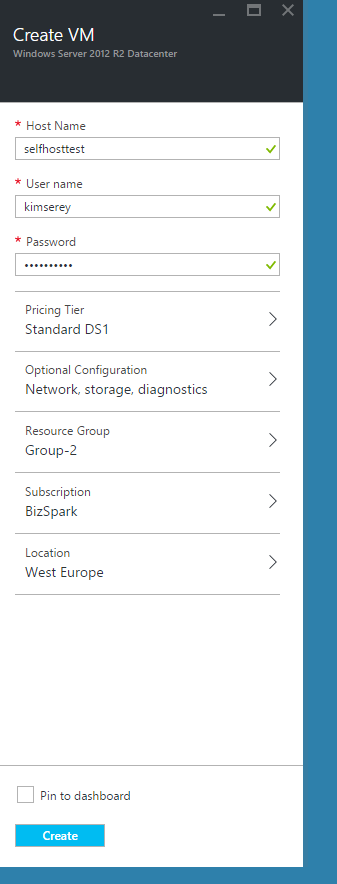
Go to the azure portal and create a VM.
Once created, RDP into the VM. At the moment in the Azure portal, the RDP button looks like this:

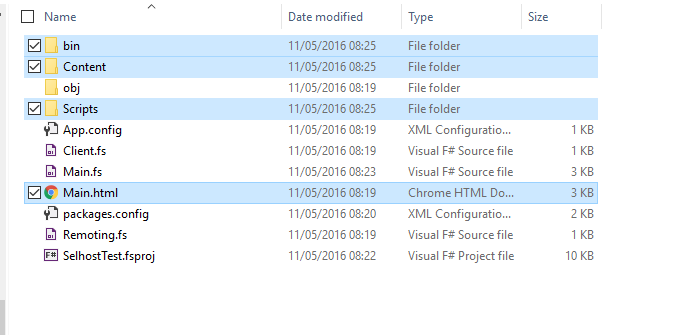
Copy the following files into a folder on your VM and run the executable.
It should run without issue but it will not be accessible from outside the VM yet.
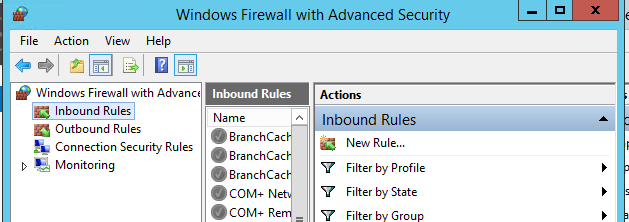
We need to open the inbound port on your firewall to let others access this endpoint.
Open the Windows Firewall setting window and click on Inbound Rules, New rule and add your endpoint.
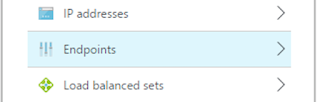
The last step is to tell Azure about your public endpoint.
This is set from the Azure portal, find the settings of your VM and add the endpoint 9600.
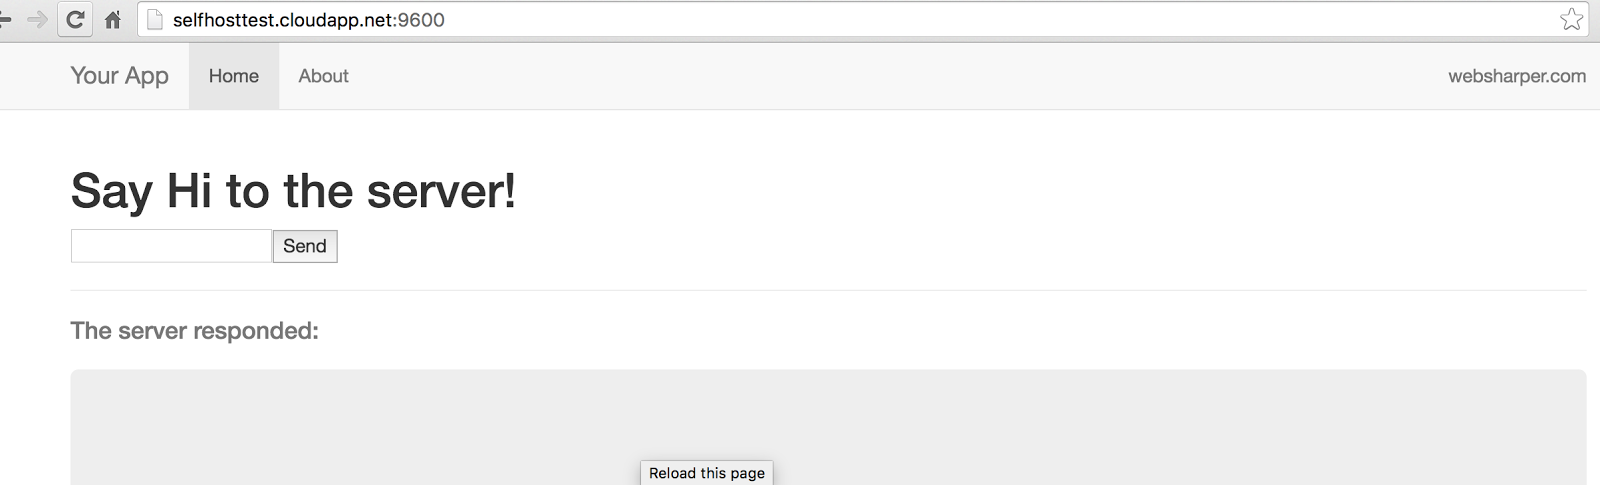
Now your webapp should be accessible from anywhere on the internet. Congratulation you have deployed your WebSharper selfhosted webapp!
Conclusion
Today we saw how we could deploy a web app built with WebSharper easily. It might have felt like a lot of steps but the whole process only takes few minutes. All you need to remember is to open the port on the firewall and specify the port on Azure settings. For web apps which handle a small amount of users, a selfhost is a very good approach as it is easy and cost efficient to have a single VM hosting multiple selfhosted web apps. By showing you this I hope it completed the whole picture from developping to deploying web apps. Let me know if you deploy some amazing web apps! If you have any comments, hit me on Twitter @Kimserey_Lam. See you next time!


