Ocr Websharper Extract Text From Images

May 7th, 2016 - written by Kimserey with .
Last week I talked about how I used Deedle to make some basic statistics on my expenses. Using my bank statements, I showed how to categorize, group, sum and sort expenses in order to have a better view on where the money goes. It was helpful but I realised that instead of checking each transaction from the bank statement, it would be better to track individual item purchased. A lot of expense trackers work this way. We need to input every expense one by one manually. It takes a lot of time which is why I always ended up not using them. I needed to find a faster way.
Today I will share with you how I built a webapp which - takes an image and extract the text.
You can view the site live here and the source code is available on my github here.
I went through four phases before being able to build this prototype:
- Use Tesseract OCR - .NET
- Dont’ try to train Tesseract
- Use ImageMagick to clean the image and try again
- Boot up a OWIN selfhost WebSharper Client-Server app
1. Use Tesseract OCR - .NET
The initial idea was to extract text from a receipt image. I had no idea about how I would proceed so I started to search for tools to “read text from images”. A quick search came out with lot of results containing the term OCR - Optical Character Recognition. One of the most popular OCR library available on .NET at the moment is Tesseract.
Tesseract has some trained machine learning algorithms which detect text in images. It has already been trained on lots of common fonts with its training data available here.
To start using it, we need to download it from Nuget.
1
Install-Package Tesseract
Get the training data and place it into a /tessdata folder which is set to be copied to output.
With the following code, we can now extract the data from an image:
1
2
3
4
5
use engine = new TesseractEngine(@"./tessdata", "eng", EngineMode.Default))
use img = Pix.LoadFromFile(__SOURCE_DIRECTORY__ + "/img/original.jpg"))
use page = engine.Process(img)
printfn "%s" (page.GetText())
printfn "Confidence: %.4f" (page.GetMeanConfidence())
Make sure you have Visual Studio 2015 x86 and x64 Runtimes installed otherwise while running you might hit an error. This is important if, like me, you will deploy your application on a Azure classic VM.
When I ran for the first time Tesseract, I notice mistakes in the detection. So I started to check how to improve the detection. That’s where I made a mistake, I jumped into training Tesseract.
2. Dont’ try to train Tesseract
Tesseract has been in development for a long time already and has been trained to recognize lots of fonts. If the text recoginition is poor, chances are that the problem lies somewhere else than in Tesseract. In fact for me, the problem came from the poor quality of the image.
Training Tesseract wasn’t a viable solution for my issue. Also giving additional training data would take a lot of time. If you need to read an unknown font or even harder, read a handwritten text then you will have to train Tesseract. But it won’t be a piece of cake :).
Lucky me, my issue was related to my image. I needed a way to clean the image. After few hours of search I found ImageMagick.
3. Clean the image with ImageMagick and try again
ImageMagick is an amazing library which contains an enormous amount of functions to manipulate images. It can be used in command line but there is also a .NET wrapper to use it in the code. I am using ImageMagick with TextCleaner to remove all the noise from the image and keep only the text.
1
2
Install-Package Magick.NET-Q16-AnyCPU
Install-Package FredsImageMagickScripts.TextCleaner
FredsImageMagickScripts is a set of C# files which uses ImageMagick.
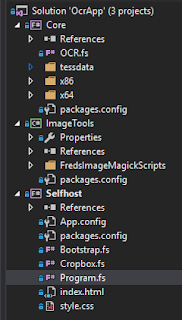
So I’ve added a C# project to add the scripts which I then referenced into my F# project.

Textcleaner is simple to use, all you need to do is instantiate a TextCleanerScript and pass it a MagickImage.
1
2
3
4
5
6
7
8
9
10
let cleanImg imgStream =
    use img = new MagickImage(new Bitmap(Bitmap.FromStream imgStream))
    let cleaner = TextCleanerScript()

    // A lot of options can be set on the cleaner
    // cleaner.FilterOffset <- 10.
    // cleaner.SmoothingThreshold <- 5.

    let cleaned = cleaner.Execute(img).ToBitmap()
    cleaned
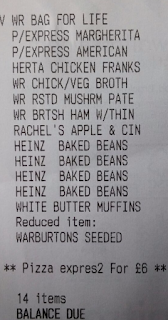
Just to give an example of how amazing it is. Here’s the image before cleaning:

Here’s the image after cleaning:

Take note that this is with default configurations of TextCleaner. We can set a lot of options which will yield even better cleaning. Using the cleaned image, we can use that image with the OCR.
1
2
3
4
5
6
7
8
9
10
11
12
13
let getText imgStream =
    // Use ImageMagick to process image before OCR
    //
    use img = new MagickImage(new Bitmap(Bitmap.FromStream imgStream))
    let cleaner = TextCleanerScript()
    let cleaned = cleaner.Execute(img).ToBitmap()

    // Use processed image with Tesseract OCR to get text
    //
    use engine = new TesseractEngine("tessdata", "eng")
    use img    = PixConverter.ToPix cleaned
    use page   = engine.Process img
    page.GetText()
Here’s the result using the original image:
1
2
3
4
5
6
7
8
9
10
11
12
13
14
15
16
V MR BAC FOR LIFE
P/EXPRESS MARGHERITA
P/EXPRESS AMERICAN
HERTA CHICKEN FRANKS
NR CHICK/VEG BROTH
NR RSTD MUSHRM PATE
NR BRTSH HAM W/THIN
RACHEL'S APPLE & CIN
HEINZ BAKED BEANS
HEINZ BAKED BEANS
HEINZ BAKED BEANS
HEINZ BAKED BEANS
WHITE BUTTER MUFFINS
Reduced item:
NARBURTUNS SEEDED
*1: Pizza expresz
And here’s the result using the cleaned image:
1
2
3
4
5
6
7
8
9
10
11
12
13
14
15
16
17
18
V HR BAG FOR LIFE
P/EXPRESS MARGHERITA
P/EXPRESS AMERICAN
HERTA CHICKEN FRANKS
WR CHICK/VEG BRDTH
NR RSTD MUSHRM PATE
NR BRTSH HAM W/THIN
RACHEL'S APPLE & CIN
HEINZ BAKED BEANS
HEINZ BAKED BEANS
HEINZ BAKED BEANS
HEINZ BAKED BEANS
WHITE BUTTER MUFFINS
Reduced item:
WARBURTONS SEEDED
** Pizza expresZ For 28 **
14 items
BALANCE DUE
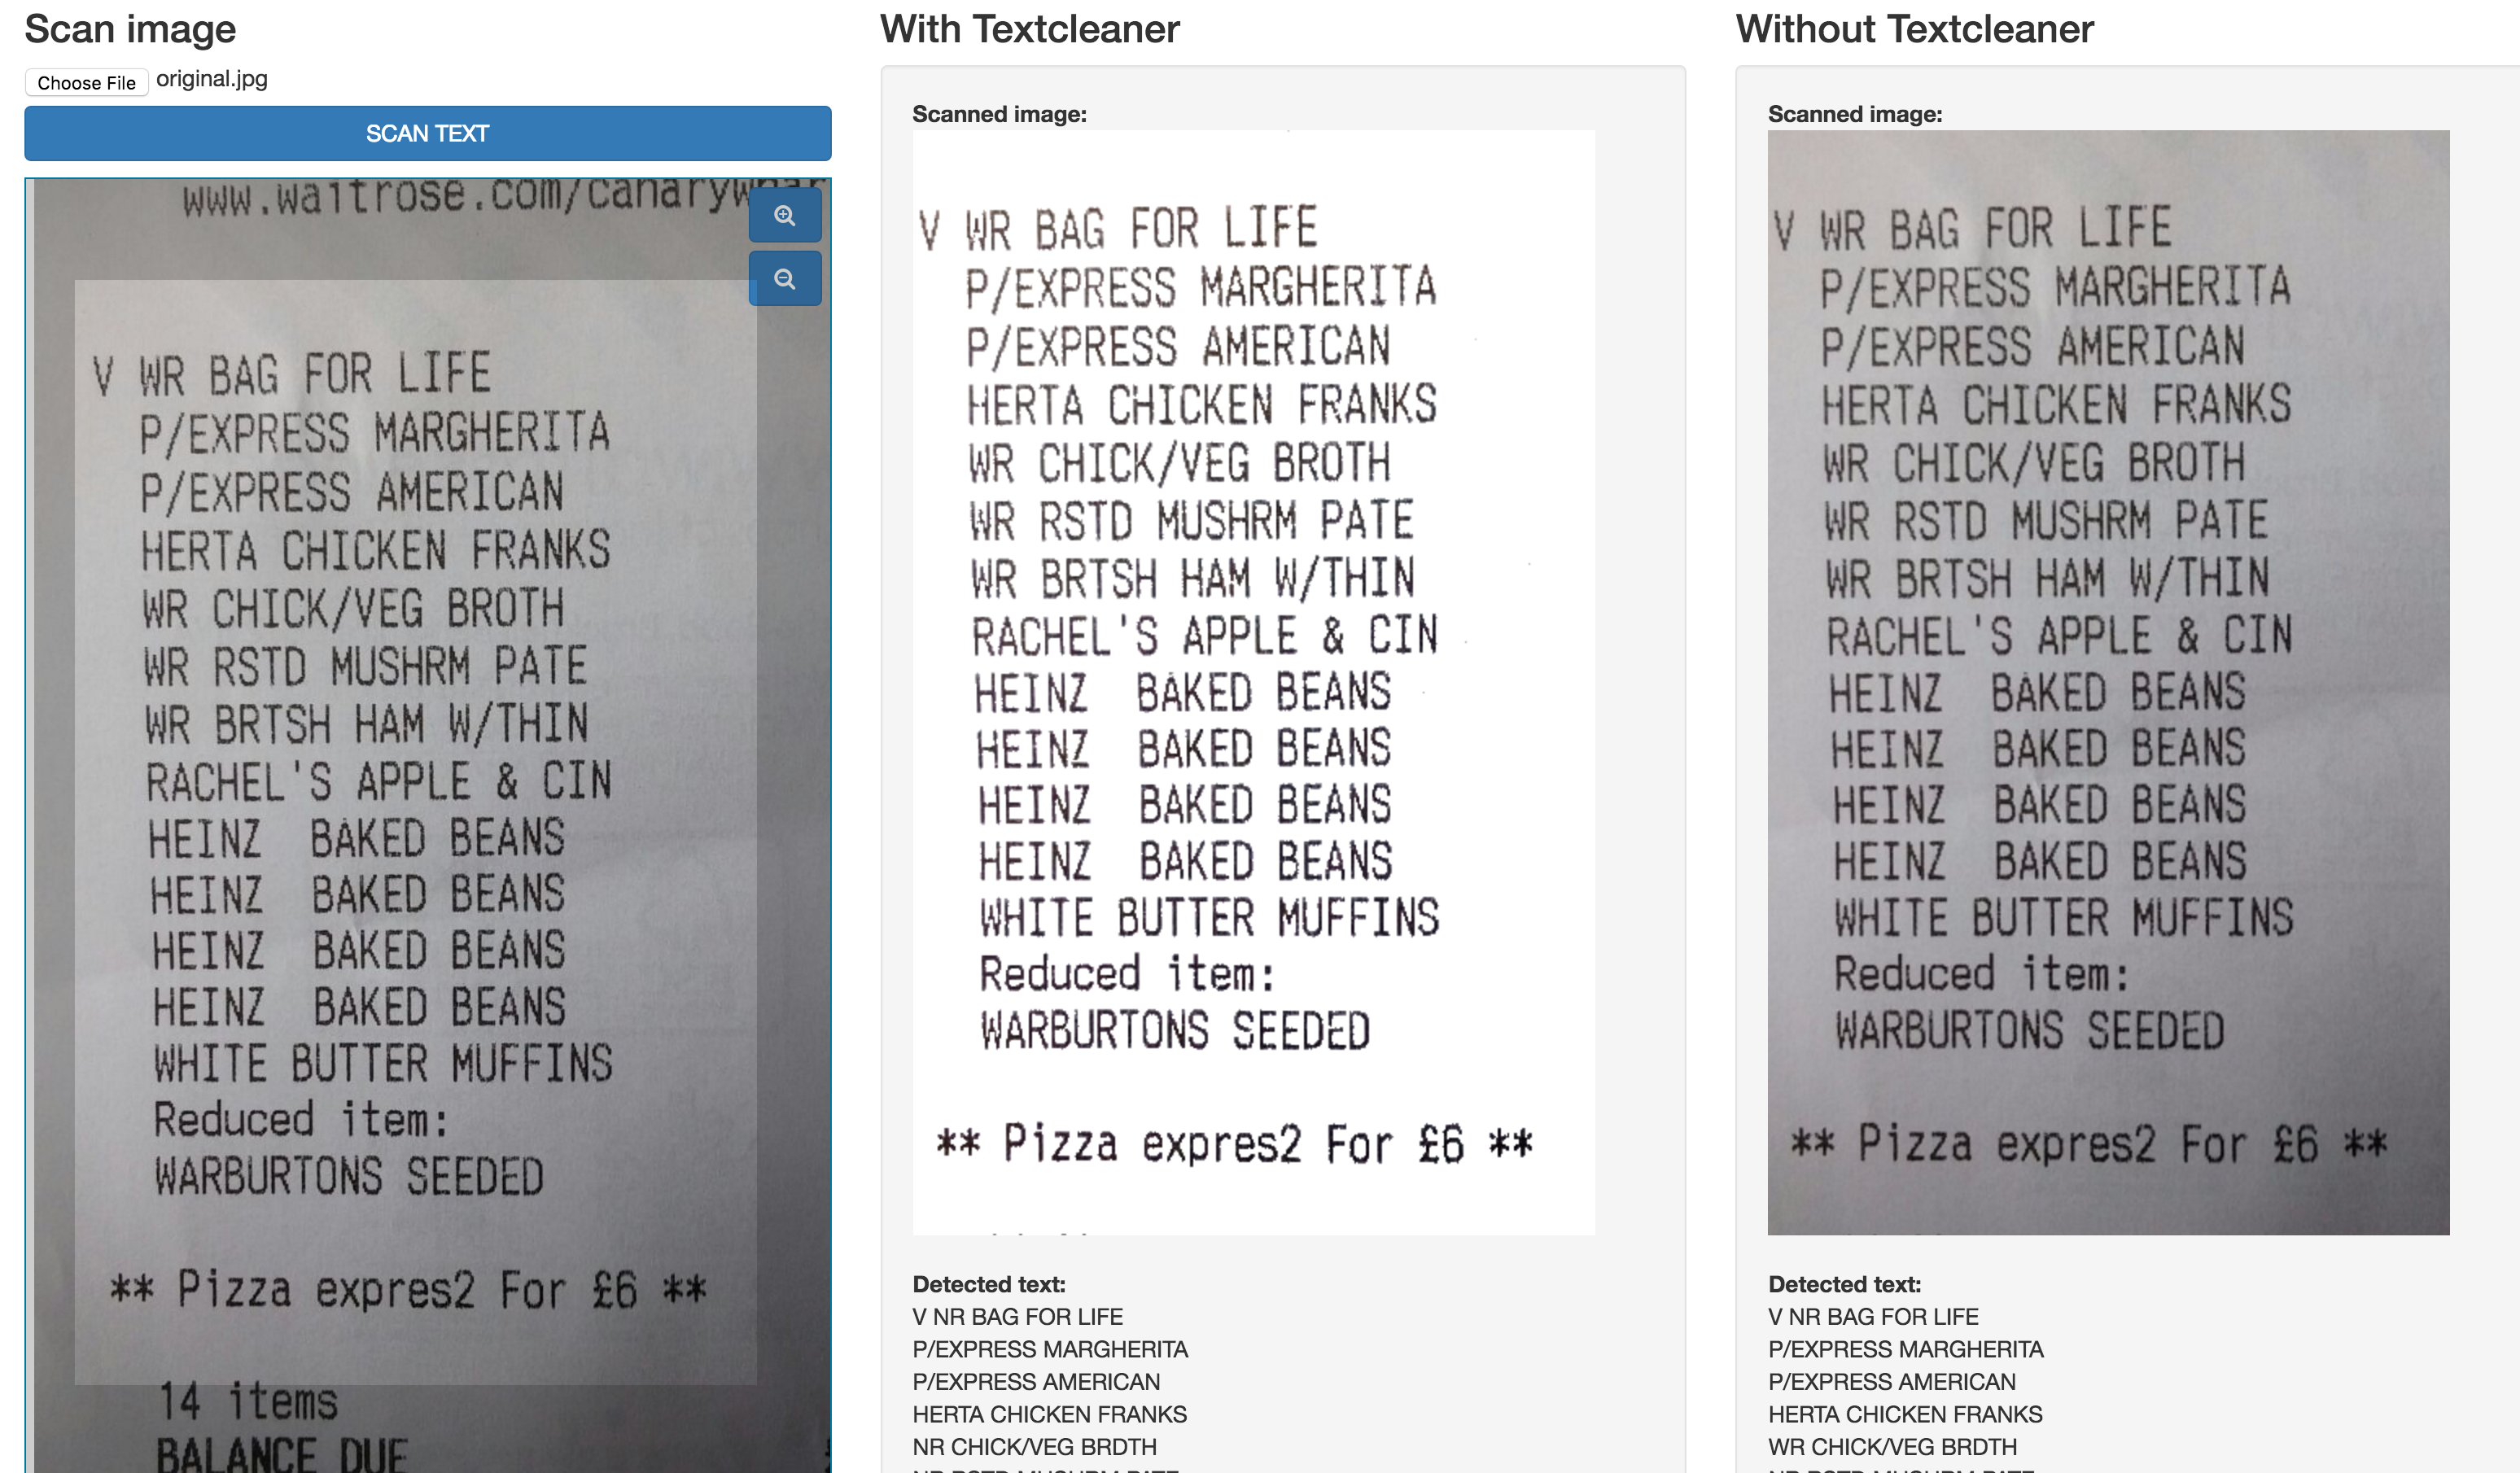
We can see that the result has improved as the last part could not be read from the original image, probably due to the shadow. It is still not perfect but it is very unlikely that we would have a perfect result.
Now we have the necessary elements to build the core functionalities, the last bit is to place it in a webapp.
4. Boot up a OWIN selfhost WebSharper Client-Server app
This part isn’t necessary but I thought I would put together a tool to directly visualise the effect of cleaning the image with TextCleaner. And also demonstrate the result.
The webapp is accessible here http://arche.cloudapp.net:9000
For the image upload and crop, I am using cropbox - A JS library to upload image and crop directly in the browser. The source is available here. If you need to know how to use JS libraries with F# and creating bindings under WebSharper, you can read my previous post - External JS library with Websharper in F#.
For the style of the webapp, I am using a Bootstrap. The source is available here. If you want to know more about it you can read my previous post - Method chaining for Bootstrap
To call the core functions, I am using a simple RPC:
1
2
3
4
5
[<Rpc>]
let getText (imageBase64String: string): Async<string list * float> =
    use memory = new MemoryStream(Convert.FromBase64String imageBase64String)
    let OCR.TextResult txt, OCR.Confidence confidence = OCR.getText memory
    async.Return (txt.Split '\n' |> Array.toList, float confidence)
And finally everything is booted on a OWIN selfhost.

Here’s the full WebSharper code, it can be found here:
1
2
3
4
5
6
7
8
9
10
11
12
13
14
15
16
17
18
19
20
21
22
23
24
25
26
27
28
29
30
31
32
33
34
35
36
37
38
39
40
41
42
43
44
45
46
47
48
49
50
51
52
53
54
55
56
57
58
59
60
61
62
63
64
65
66
67
68
69
70
71
72
73
74
75
76
77
78
79
80
81
82
83
84
85
86
87
88
89
90
91
92
93
94
95
96
97
98
99
100
module Remoting =
    [<Rpc>]
    let getTextNoCleaning (imageBase64String: string): Async<string * string list * float> =
        use memory = new MemoryStream(Convert.FromBase64String imageBase64String)
        let OCR.Image imageBase64, OCR.TextResult txt, OCR.Confidence confidence = OCR.getTextNoCleaning memory
        async.Return (imageBase64, txt.Split '\n' |> Array.toList, float confidence)

    [<Rpc>]
    let getText (imageBase64String: string): Async<string * string list * float> =
        use memory = new MemoryStream(Convert.FromBase64String imageBase64String)
        let OCR.Image imageBase64, OCR.TextResult txt, OCR.Confidence confidence = OCR.getText memory
        async.Return (imageBase64, txt.Split '\n' |> Array.toList, float confidence)

[<JavaScript>]
module Client =
    open Bootstrap

    let ocrResult = Var.Create ("", [], 0.)
    let ocrNoCleaningResult = Var.Create ("", [], 0.)
    let isLoading = Var.Create false


    let display txtView isLoadingView =
        divAttr
            [ attr.``class`` "well" ]
            [ (txtView, isLoadingView)
              ||> View.Map2 (fun (imgBase64, txt, confidence) isLoading ->imgBase64, txt, confidence, isLoading)
              |> Doc.BindView(fun (imgBase64: string, txt: string list, confidence: float, isLoading: bool) ->
                    if isLoading then
                        iAttr [ attr.``class`` "fa fa-refresh fa-spin fa-3x fa-fw margin-bottom" ] [] :> Doc
                    else
                        [ strong [ Doc.TextNode "Scanned image:" ]
                          div [ imgAttr [ attr.src ("data:image/jpeg;base64," + imgBase64) ] [] ]
                          br []
                          p [ yield strong [ Doc.TextNode "Detected text:" ] :> Doc
                              yield! txt |> List.map (fun t -> div [ Doc.TextNode t ] :> Doc) ]
                          br []
                          strong [ Doc.TextNode ("Confidence:" + string confidence) ] ]
                        |> Seq.cast
                        |> Doc.Concat) ]

    let handle (img: Image) =
        async {
            Var.Set isLoading true
            let! res1 = Remoting.getText img.ContentBase64
            Var.Set ocrResult res1
            let! res2 = Remoting.getTextNoCleaning img.ContentBase64
            Var.Set ocrNoCleaningResult res2
            Var.Set isLoading false
        } |> Async.Start

    let main() =
        [ Header.Create HeaderType.H1 "Read text from image in WebSharper/F#"
          |> Header.AddSubtext "Using ImageMagick and Tesseract-OCR"
          |> Header.Render

          Hyperlink.Create(HyperlinkAction.Href "https://twitter.com/Kimserey_Lam", "-> Follow me on twitter @Kimserey_Lam <-")
          |> Hyperlink.Render :> Doc
          br [] :> Doc
          Hyperlink.Create(HyperlinkAction.Href "https://github.com/Kimserey/OcrApp", "-> Source code available here <-")
          |> Hyperlink.Render :> Doc

          GridRow.Create [ GridColumn.Create([ Header.Create HeaderType.H3 "Scan image"
                                               |> Header.Render
                                               Cropbox.cropper handle ], [ GridColumnSize.ColMd4; GridColumnSize.ColSm6 ])

                           GridColumn.Create([ Header.Create HeaderType.H3 "With Textcleaner"
                                               |> Header.Render
                                               display ocrResult.View isLoading.View ], [ GridColumnSize.ColMd4; GridColumnSize.ColSm6 ])

                           GridColumn.Create([ Header.Create HeaderType.H3 "Without Textcleaner"
                                               |> Header.Render
                                               display ocrNoCleaningResult.View isLoading.View ], [ GridColumnSize.ColMd4; GridColumnSize.ColSm6 ])]
          |> GridRow.AddCustomStyle "margin-top: 50px;"
          |> GridRow.Render :> Doc ]
        |> Doc.Concat

module Site =
    module Main =
        type Page = { Body: Doc list }
        let template =
            Content
                .Template<Page>("~/index.html")
                .With("body", fun x -> x.Body)

        let site = Application.SinglePage (fun _ ->
            Content.WithTemplate template { Body = [ divAttr [ attr.style "padding:15px;" ] [ client <@ Client.main() @> ] ] })

    [<EntryPoint>]
    let main args =
        let rootDirectory, url = "..", (new UriBuilder(new Uri("http://localhost:9000/"), Host = "+")).ToString()
        use server = WebApp.Start(url, fun appB ->
            appB.UseStaticFiles(
                    StaticFileOptions(
                        FileSystem = PhysicalFileSystem(rootDirectory)))
                .UseSitelet(rootDirectory, Main.site)
            |> ignore)
        stdout.WriteLine("Serving {0}", url)
        stdin.ReadLine() |> ignore
        0
Conclusion
This post wasn’t so much about the coding. I wanted to share with you the tools available to do OCR. And more importantly I wanted to show how quick and easy it was to put a workable project together with WebSharper and F#. There is still a lot of work to do to get the text correct before it can be really useful. Textcleaner can be configured better to remove more noise and make the text clearer. And the text still needs to be processed and saved in a useful format. I will be doing it next so let me know if you like this topic and I will try to blog about it! Anyway I hope this post gave you some ideas. If it did let me know on twitter @Kimserey_Lam! See you next time!