Figma Constraints

Apr 17th, 2020 - written by Kimserey with .
Few weeks ago we looked into the auto layout feature of Figma to create flexible layout which adapt to new elements placed into them and allow to automatically arrange elements while maintaining padding and alignment. Another great feature of Figma used to handle placement of elements within a frame is to use constraints. Constraints in Figma come in multiple format, in today’s post we will explore each one of them and understand how they are used.
Constraints Usage
Constraints are availabe on elements, frames (which aren’t part of an auto layout), shapes and texts.
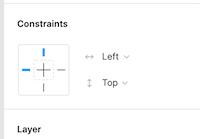
The constraints settings can be found in the design tab on the right panel:

They are used to dictate how the element’s dimensions will change when it’s parent frame dimensions change.
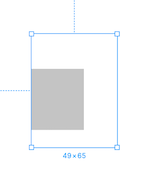
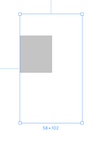
The default constraints applied to elements is Left and Top which indicates that when the frame is resized, the element will maintain its X and Y, unless the frame gets completely reversed which in this case, X will be -X or Y will be -Y depending on the direction.


We can see that the resize of the frame did not change the placement of the rectangle.
Types of Constraints
The options provided to apply constraints on the horizontal axis are:
- Left
- Right
- Left & Right
- Scale
- Center
We will only explore the horizontal constraints as the same pattern applies to the vertical constraints.
Left
Left will fix the left side,


We can see that after resizing the frame, the rectangle positioning is left unchanged.
Right
Right will fix the right side,


We can see that after resizing the frame, the rectangle positioning is moved as the right side is kept constant.
Left & Right
Left and right will fix both sides,


We can see that after resizing the frame, the rectangle dimensions changed as the side’s spacing from the frame of the rectangle were kept constant.
Scale
Scale will scale the side’s spacing.


We can see that after resizing the frame, the rectangle dimensions changed due to the side’s spacing from the frame being scaled as the frame updated.
Center
Lastly center will keep the distance from the center constant.


we can see that after resizing the frame, the rectangle kept its center position.
And that concludes today’s post!
Conclusion
Today we looked into Figma constraints, we saw how we could set them in such a way that the element will keep its position or stretch depending on the constraint set. This allows us to make flexible designs that adapt when frames are resized. I hope you liked this post and I see you on the next one!