Self Signed Certificate For Identity Server


To sign our JWT tokens, Identity Server 4 requires a signing credential. Today we will see how we can create our own key and provide it to Identity Server to be used as signing credential.
- Configure ASP NET Core
- Create key with
openssl - Selfsigned certificate for local SSL usage
If you are new to Identity Server, you can have a look at my previous blog post on How to configure a Implicit authentication with Identity Server.
1. Configure ASP NET Core
We start first by creating an extension on top of the IIdentityServerBuilder which when the key is available, will load our own key using the .AddSigningCredential() else will create a temporary key for development purposes, .AddDeveloperSigningCredential().
1
2
3
4
5
6
7
8
9
10
11
12
13
14
15
16
public static class IdentityServerBuilderExtensions
{
    public static IIdentityServerBuilder LoadSigningCredentialFrom(this IIdentityServerBuilder builder, string path)
    {
        if (!string.IsNullOrEmptyString(path))
        {
            builder.AddSigningCredential(new X509Certificate2(path));
        }
        else
        {
            builder.AddDeveloperSigningCredential();
        }

        return builder;
    }
}
Using the configuration appsettings.production.json, we add a signingCredential section.
1
2
3
"certificates": {
    "signing": "/etc/myapp/myapp.pfx"
}
We did not add the section in the appsettings.development.json therefore it will be null in development which is what we want for Identity Server to use the temporary key. Next we use the extension in the Startup.cs where we configured Identity Server:
1
2
3
4
5
6
7
var identityServerBuilder = services
    .AddIdentityServer()
    .LoadSigningCredentialFrom(Configuration["certificates:signing"])
    .AddInMemoryIdentityResources(...)
    .AddInMemoryApiResources(...)
    .AddInMemoryClients(...)
    .AddAspNetIdentity<ApplicationUser>();
Now that we are loading the key from a physical path, we can create the key.
2. Create key with openssl
To generate the key we will be using openssl on Ubuntu 16.04. We start firt by generating the private key myapp.key and public certificate myapp.crt:
1
sudo openssl req -x509 -newkey rsa:4096 -keyout myapp.key -out myapp.crt -days 3650 -nodes -subj "/CN=myapp"
We name .key and .crt to follow the convention used in ssl for certificates which can be found under /etc/ssl/(private|certs). Next we combine them into a key myapp.pfx usable by dotnet:
1
openssl pkcs12 -export -out myapp.pfx -inkey myapp.key -in myapp.crt -name "Some friendly name"
The resulting .pfx is the file which can be used to instantiate a X509Certificate2 object we needed in 1).
If we already have a .pfx and want to extract the private key myapp.key and public key myapp.crt:
1
2
openssl pkcs12 -in key.pfx -nocerts -out myapp.key -nodes
openssl pkcs12 -in key.pfx -nokeys -out myapp.crt
3. Selfsigned certificate for local SSL usage
Just like how we created a key to be used for signing credentials, it is possible to use openssl to create selfsigned certificate to be used for SSL.
1
2
sudo openssl req -x509 -newkey rsa:4096 -keyout localhost.key -out localhost.crt -days 3650 -nodes -subj "/CN=localhost"
openssl pkcs12 -export -out localhost.pfx -inkey localhost.key -in localhost.crt -name "Localhost selfsigned certificate"
1
2
3
4
5
6
7
8
9
10
11
12
13
14
public static IWebHostBuilder CreateWebHostBuilder(string[] args) =>
    WebHost.CreateDefaultBuilder(args)
        .UseKestrel(opts =>
        {
            var configuration = opts.ApplicationServices.GetService<IConfiguration>();
            opts.Listen(IPAddress.Loopback, 5000);
            opts.Listen(IPAddress.Loopback, 5001, listenOptions =>
            {
                listenOptions.UseHttps(
                    new X509Certificate2(configuration["certificate:ssl"])
                );
            });
        })
        .UseStartup<Startup>();
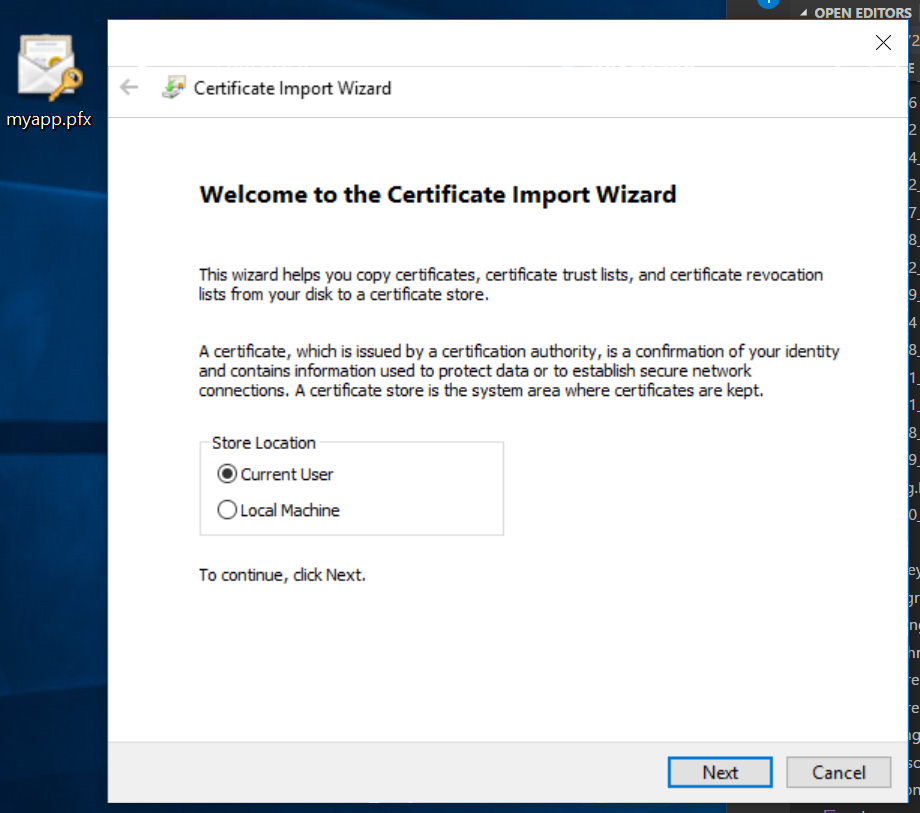
Before starting the application, we can install the certificate in our Trusted Root Certification Authorities which would allow the computer to recognize the certificate when delivered by the webserver. This can be done by opening the .pfx file and follow the wizard to install under Trusted Root Certification Authorities.
Once installed, we run the application, we face the following issue:
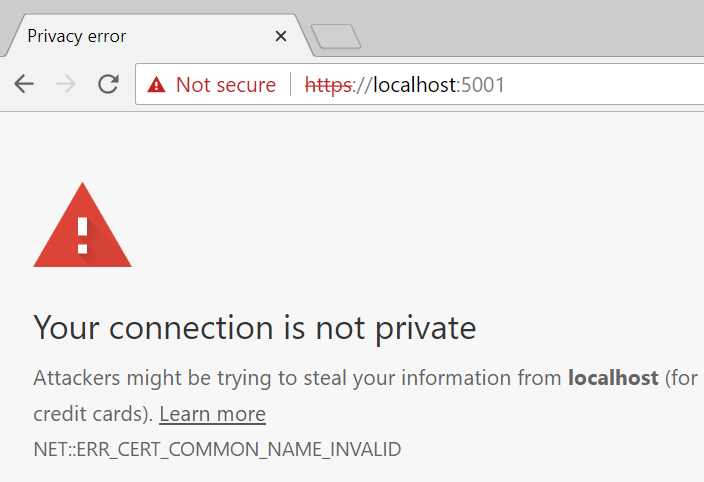
Our certificate isn’t trusted even though we imported it into the trusted certificates. This is due to the fact that we did not specified a Subject Alternate Name. Comparing our certificate to the certificate from ASPNET Core, we can see that we are missing the subject alternate name:
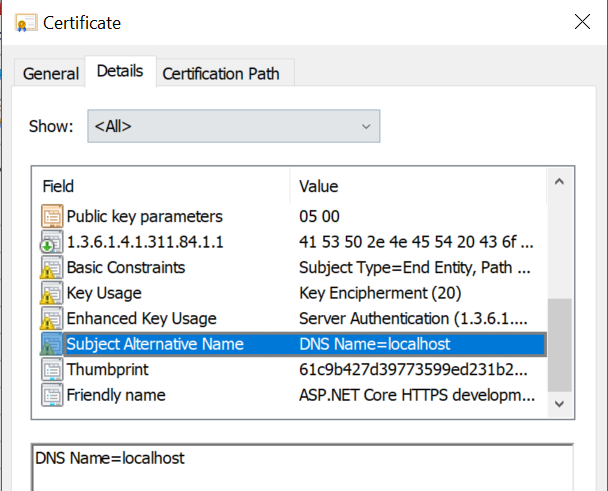
More information here. Chrome has dropped the verification of domain name using “Subject” in favor of “Subject Alternate Name” which was dropped few versions ago by Mozilla too.
One problem is that openssl does not provide options on its CLI to set the subject alternate name. The way to do it is to provide a configuration using -config
1
cp /etc/ssl/openssl.cnf ~/ssl-selfsigned.cnf
Under [ v3_ca ], add the following subjectAltName=DNS:localhostat the end:
[ v3_ca ]
... some configs ...
subjectAltName=DNS:localhost
v3_ca is the section used to configure x509 extensions as we can find further up the config:
1
2
3
[ req ]
... some configs ...
x509_extensions = v3_ca
And [ req ] is the command we use to create a new x509 certificate. Once the file has been updated with the subjectAltName, we can generate the certificate using the same commands as we saw earlier and specify the config -config ssl-selsigned.cnf.
1
sudo openssl req -x509 -newkey rsa:4096 -keyout ssl-selfsigned.key -out ssl-selfsigned.crt -days 3650 -nodes -subj "/CN=localhost" -config ssl-selfsigned.cnf
When we display the content of the cert, we should see the ` X509v3 Subject Alternative Name: DNS:localhost at the end of the X509v3 extensions` section.
1
openssl x509 -in localhost-selfsigned.crt -noout -text
Lastly we export this key and import it into our certificate manager and use it for our SSL connection.
1
sudo openssl pkcs12 -export -out ~/ssl.pfx -inkey ssl-selfsigned.key -in ssl-selfsigned.crt -name "Localhost Selfsigned"
Now when we navigate to https://localhost:5001, Chrome will be able to validate the certificate and provide that indication that the connection is secured using our selfsigned certificate.

And this concludes today’s post.
Conclusion
Today we saw how we could register our own key to be used to sign our tokens delivered by Identity Server. We started by configuring Identity Server to use the key if we pass the path to it else use a development key. We create a key using openssl for both signing credential and another key following the same method for SSL selfsigned certificate. Hope you liked this post, see you next time!


